DIY Perler/Hamma Bead Storage Shelf!
- Megan Weller

- Sep 18, 2019
- 3 min read
Updated: Nov 15, 2019

Hey guys! Since a lot of crazy things are happening on YouTube right now, I thought it would be fun to turn some of my older videos into blog posts. This is a pattern that I came up with on my own, I hope you like it!
If you want to just watch the video, you can find it here:

This shelf is made in two parts, since it has a drawer inside. I used a standard square/rectangular pegboard and a circular one for this project. You'll also need a hot glue gun, Command Picture Hanging Strips and of course some Perler Beads.
For the outside of the shelf, make two pieces that look like this. You will need 353 beads for each piece.


For the sides of the shelf, make two pieces that look like this:

I didn't have enough dark purple beads, which is why I used light purple in the middle of these pieces, but of course you can make them a solid color.
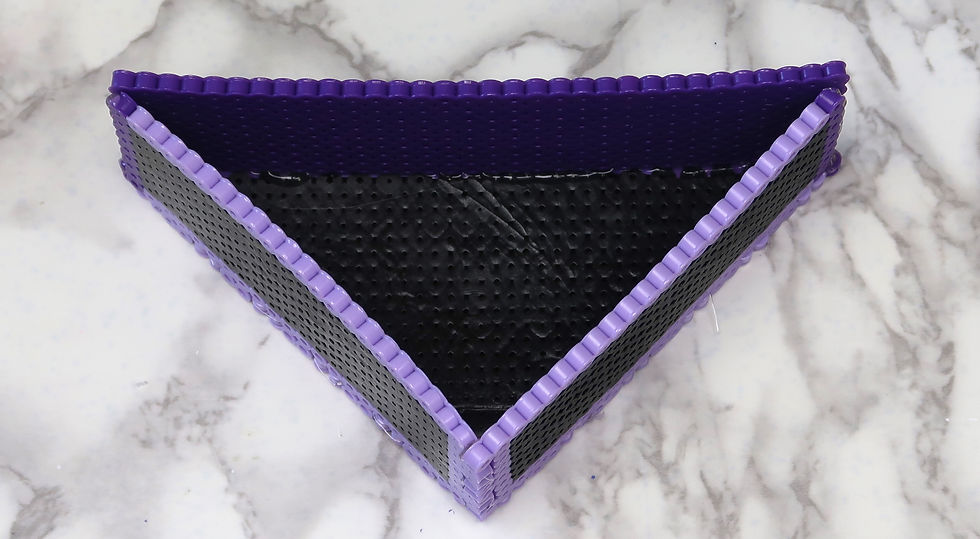
The outer shell should fit together like a puzzle. I'll explain it in pictures as well as I can, but I'd suggest watching the video if you get stuck.
It's a good idea to attach the shelf pieces with hot glue. Place the hot glue on the "tabs" that stick out before snapping the pieces together.
Lay out all four pieces like this:

Snap the left piece on to one of the triangles:

Then the right piece:

And stick the second triangle on top:

You'll have to work quickly when using hot glue, but it isn't too difficult.
Here's a look at the outer part of the shelf from another angle:

Now we can make the drawer. Make 1 piece that looks like this:

Again, I used various colors because I didn't have enough purple. Just be sure to make the diagonal line (the purple beads) the color that you want the front of your drawer to be.
For the sides of the drawer, make two pieces that look like this:

Again, the color doesn't matter as much as long as you put the color you want the front of your drawer to be where I have the purple beads.
For the front of the drawer, make a rectangle using 288 beads.

Finally, use a circular pegboard to create the knob. I made a circle with 7 beads:

and a circle with 19 beads:

Now that all of the pieces are made, it's time to attach them.
Lay the four largest pieces out like this:

Snap in one of the rectangular pieces:

Then the other one:

Attaching the front piece is a little tricky. Place hot glue on the edges of the front of the box, and sit the rectangle on top. Again, I'd recommend checking out the video if you get stuck.
Here's a look at the drawer from another angle:

Now all we have left to assemble is the knob.

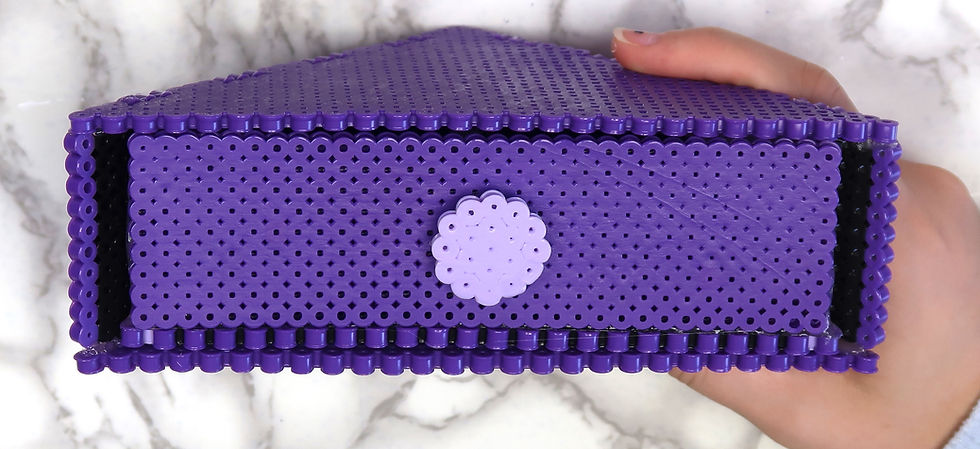
Glue the smaller circle on top of the bigger circle:

Then glue the smaller circle on to the center of the drawer front:

Now, your shelf should be in two pieces that look like this:

Just slip the drawer in, and your shelf is ready to hang!
I hung my corner shelf using the Command Large Picture Hanging Strips

There were some comments on the video questioning the stability of the shelf. I made my first shelf back in January (so about 9 months ago) and it hasn't failed me yet! I keep a Funko Pop (Cher from Clueless) and a signed Grace Vanderwaal CD insert (I made the frame myself) on top, and put extra push pins in the drawer.

I made a second shelf because I needed some additional photos for my blog (plus they're just cool and I wanted another one 😅) I put a signed Taylor Swift CD insert and my Wednesday Addams Funko Pop on top. Stay tuned for my next blog post to learn how to make the frame!

You can purchase Perler beads on Amazon (affiliate links)
It's cheaper to buy them in a bucket all mixed together: https://amzn.to/2Luqys2
But I'd HIGHLY recommend buying them pre-sorted: https://amzn.to/2QbmgKN
(Trust me on this one. I was crazy enough to sort one of those buckets earlier this year, and that was 15 hours I'll never get back! 😂)
If you need a pegboard, I'd highly recommend this one: https://amzn.to/32E5LIr
Thanks for checking out my blog! I usually make tutorials in video form, so please bear with me as I figure out this whole blogging thing 😅 I love making YouTube videos, and there are PLENTY more in the works (I'm in the middle of editing 3 different things right now) but I thought it would be fun to do some extra things 😊 I love you all so much, and I'll see you soon!
💜 Megan


Mantan pemain Madrid tersebut dinilai memahami betul karakter klub. Lisandro Martinez Sempat Ingin Gantung Sepatu
slot gacor, slot gacor, slot gacor, slot gacor, slot gacor, slot gacor, slot gacor, raja168, raja168, raja168, raja168, raja168, raja168, slot gacor, slot gacor, slot gacor, slot gacor, slot gacor, slot gacor, slot gacor, raja168, raja168, raja168, slot gacor, slot gacor, slot gacor, slot gacor, slot gacor, slot gacor, slot gacor, slot gacor, slot gacor, slot gacor, slot gacor, raja168, slot gacor, raja168, raja168, slot gacor, slot gacor, slot gacor, slot gacor, slot gacor, raja168, raja168, slot gacor, raja168, slot gacor, slot gacor, slot gacor, slot gacor, slot gacor, raja168,
toto slot, toto slot, toto slot, toto slot, toto slot, raja168, raja168, raja168, raja168, raja168, toto slot, toto slot, toto slot, toto slot, toto slot, toto slot, toto slot, toto slot, toto slot, raja168, raja168, toto slot, toto slot, toto slot, toto slot, raja168,
On the wrist, or at least on my wrist, the Pelagos 39 is perfect. A dream. It wears much like a Black Bay Fifty-Eight but quite a bit lighter and the presence is sharper and more modern. The bezel action is smooth, with a softly muted 60-click rotation that is very much like any other Pelagos bezel I've tried. The crown, too, mimics that link of the Pelagos link range – sturdy and easy to link manipulate.
Caliber: Calibre 1315Functions: link Hours, minutes, central seconds, dateDiameter: 42.3mmThickness: 14.2mmPower Reserve: 120 hours (5 link days)Winding: AutomaticFrequency: link 4 HzJewels: 35Additional Details: Magnetic resistance due to silicon hairspring automatic movement; sapphire bezel; 21.5mm lug width